Japanese version Home Page Updated on August 1, 2001
Examine Your Image
This page introduces how to examine your image, that is, to obtain the coordinates of the image center, the field of view, etc., to list up candidates of new stars, to measure the coordinates and magnitude of all stars, and so on. Go to the PIXY System 2 page.Here is the sample FITS image used in this page. Please download it.
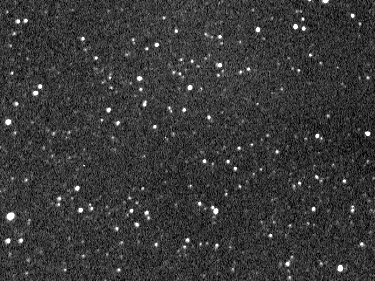
This is the image of an asteroid 2000 NM. 
Examining your image using the PIXY System 2 brings you the following profits.
Here are the steps to examine your image using the PIXY System 2.
Let's follow the steps in detail. First of all, run the PIXY System 2 and select Image Examination in the main menu window. 
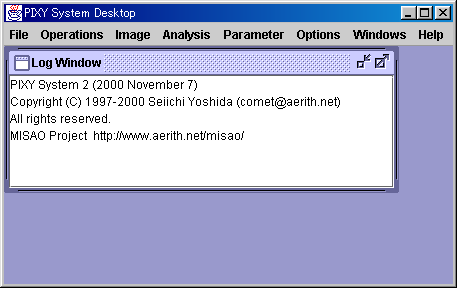
Then a new virtual desktop appears. 
First, open the image to examine. Select the [Operations] - [Open Image] menu and open the sample image you downloaded. You can drug the file from Explorer and drop it on the virtual desktop. 
Then select the [Operations] - [Detect Stars] menu and wait for some seconds, while the PIXY System 2 is detecting stars from the image. When the process completes, a Detected Stars window appears where detected stars are plotted. 
Then select the [Operations] - [Matching] menu, and a dialog appears to set up a star catalog used in examination. In case of the sample image, select USNO-A1.0 or USNO-A2.0 as a star catalog, and input 18h09m40s, -06o17' for the R.A. and Decl., and 0.3 x 0.2 deg for the field of view. 
Now wait for some seconds, while the PIXY System 2 is reading data from the star catalog and matching them with the detected stars. When the process completes, a USNO-A2.0 window appears where the data read from the star catalog are plotted. By the way, only a few stars are plotted on the USNO-A2.0 window at this time. 
Then select the [Operations] - [Make Pairs] menu and wait for some seconds, while the PIXY System 2 is measuring coordinates and magnitude of all stars, listing up stars not recorded in the star catalog, and working on some more tasks. When the process completes, stars plotted on the Detected Stars and the USNO-A2.0 windows are painted green and red. Now proper number of stars are plotted on both windows. 
A red star represents a detected star not recorded in the star catalog, or a catalog data not detected from the image. In case of the sample image, there are three bright stars not recorded in the star catalog, two are below of the image center and one is above of the image center. Click these three stars by mouse and a message box appears and shows the following data.
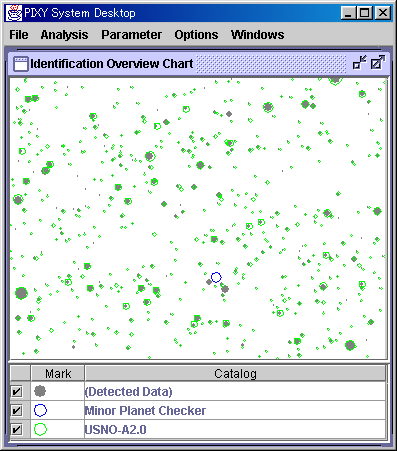
Those kinds of stars are probably a comet, an asteroid, a variable star, or maybe a new object. In order to look up comets, asteroids, variable stars, clusters and nebulae in the image field, operate the identification. Here let's look up comets and asteroids using the Minor Planet Checker. Select the [Analysis] - [Identify] menu, and a dialog appears to select a catalog to identify with. Here select the Minor Planet Checker and push the OK button. Then a dialog appears to input the date and time. In case of the sample image, please input the date and time as 2000 July 3, 14:36:17 (UT). After that, the system automatically searches using the Minor Planet Checker. When the identification process completes, a message will appear. Now let's see the identification result on the chart. Select the [Analysis] - [Identification Overview Chart] menu, and a chart window appears, where all of the detected stars, the catalog data (in the USNO-A2.0 catalog), and the identified comets and asteroids are plotted. 
Based on the chart, one of the two red stars below of the center seems to be identified with an asteroid. Click the identified star and you can see it is an asteroid 2000 NM. Due to the precise calculation, the right one of the two stars is revealed to be 2000 NM. Identification with variable stars, clusters and nebulae are also available, not only with comets and asteroids. However, no variable stars, clusters and nebulae exist in the sample image field. No known asteroids and variable stars are found at the position of the rest two red stars. They may be unknown variable stars. But another image of this field is required to confirm it. Information on the image is output to the Log Window, such as the R.A. and Decl. of the image center, field of view, rotation angle, limiting magnitude, astrometric errors, number of stars, and so one. In case of the sample image, the information is as follows.
You had better save the examination result in the XML file. Then you can review the result, to see the data or to operate identification, wnenever you select the Review in the main menu window and open the XML file. 
Examination result of the sample image: You can review the windows introduced in this page when you open this XML file in the Review mode of the PIXY System 2. |
