Japanese version Home Page Updated on November 7, 2002
Manual Astrometry/Photometry
This page introduces how to obtain the coordinates of the image center, the field of view, etc., and how to measure the coordinates and magnitude of stars in the image, by specifying some comparison stars manually. Go to the PIXY System 2 page.Here is the sample FITS image used in this page. Please download it.
This is the sample image enclosed in the PIXY System 2 package. 
Here are the steps to measure the coordinates and magnitude of stars manually using the PIXY System 2.
Let's follow the steps in detail. First of all, run the PIXY System 2 and select Image Examination in the main menu window. 
Then a new virtual desktop appears. 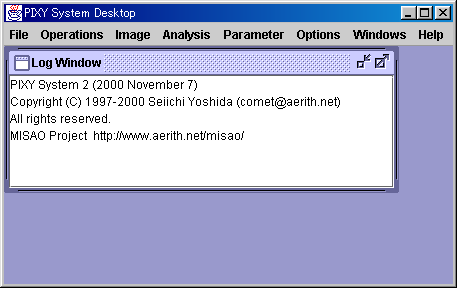
First, open the image to examine. Select the [Operations] - [Open Image] menu and open the sample image you downloaded. You can drug the file from Explorer and drop it on the virtual desktop. 
Then select the [Operations] - [Detect Stars] menu and wait for some seconds, while the PIXY System 2 is detecting stars from the image. When the process completes, a Detected Stars window appears where detected stars are plotted. 
Then click a comparison star on the Detected Stars window. In case of the sample image, please click a bright star at top left for example. 
Now a dialog appears to input the R.A., Decl. and the magnitude of this star, so please input the data of the comparison star. In case of the sample image, please input as follows. 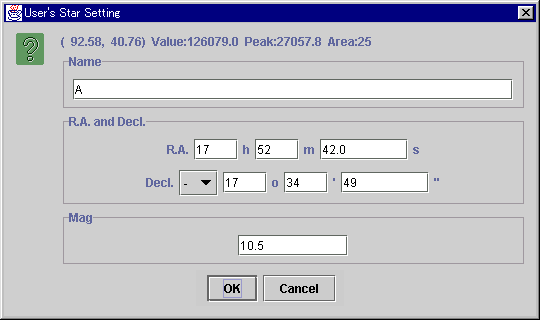
After pushing OK button, four windows open.
In addition, the comparison star is turned to be green, the other stars are turn to be red on the Detected Stars window. It is impossible to measure the coordinates with only one comparison star, so let's continue to specify more comparison stars. Click stars on the Detected Stars window and input the R.A., Decl. and magnitude of comparison stars. The PIXY System 2 can measure the coordinates and magnitude of stars with two stars. But three or more stars are recommended for accurate measurement. In case of the sample image, please specify two more comparison stars as follows. 
When it completes to specify all comparison stars, let's measure the coordinates and magnitude of stars. First, check the residuals on the Astrometry Table window and reject erroneous data with large residuals. After selecting comparison stars, push Apply button. 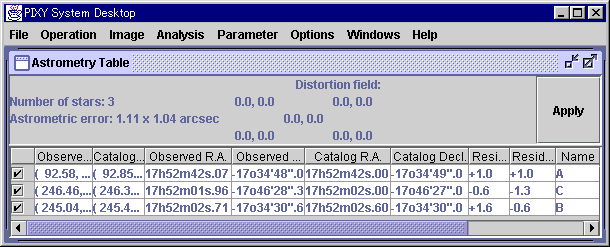
Next, check the residuals on the Photometry Table window and reject erroneous data with large residuals. After selecting comparison stars, push Apply button. 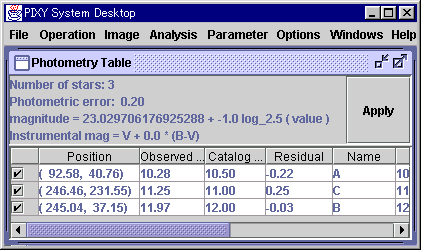
Then the image information are updated on the Image Information window. You can see the coordinates of the image center, the field of view, etc. 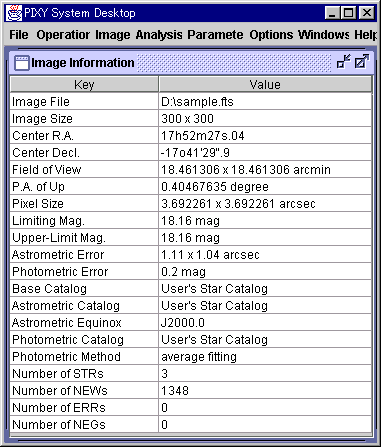
Click a star on the Detected Stars window and a message box appears and shows the measured coordinates and magnitude of the star. 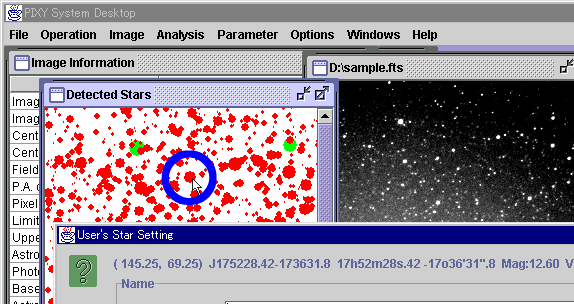
|
